The admin interface, also called the dashboard or back-end, is where you can access all the features for editing your WolfWare WordPress site. This guide provides instructions on how to access the admin interface, as well as an overview of the various tools available.
This information applies to WolfWare WordPress version 6.4. This page was last updated on 8/23/2024.
Contents:
Access the admin interface
The easiest way to access the admin interface for your course WordPress site is from WolfWare.
- Log in to WolfWare
- Locate your course or project
- If your home page is set to WordPress, click on the name to go to the site.
- If your home page is set to Moodle, click on the gears icon to access the Course Management page.
- Select WordPress in the Tool Settings menu on the left.
- Click on the “Go to WordPress Site”
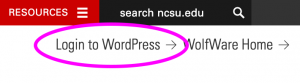
- At the top right corner of the screen underneath the search box, click on the “Login to WordPress” link
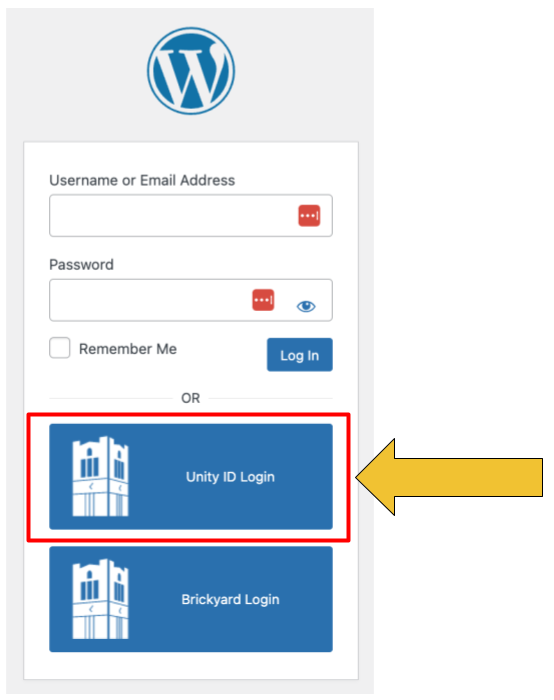
5. On the login screen, click the large “Unity ID Login” button
Components of the admin interface
After logging in you will be in the admin interface for your WordPress site. The first screen you see is called the Dashboard; it serves as the home screen for the admin interface. You will sometimes hear the entire admin interface referred to as the dashboard.
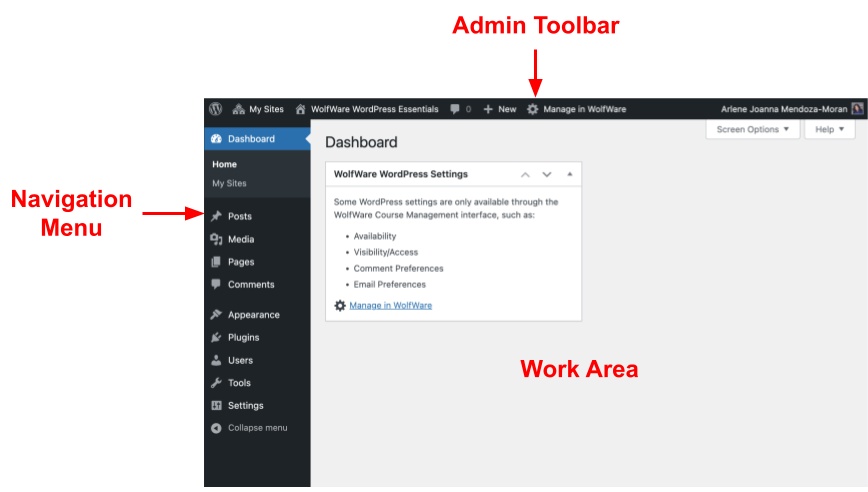
The admin interface gives you access to all the features available for editing your WolfWare WordPress site. It is organized into three main components:
- The Work Area occupies the majority of the admin interface. The contents of the Work Area depend on which tool you are using in the admin interface.
- The Admin Toolbar is located across the top of the screen
- The Navigation Menu is on the left side
The Admin Toolbar
Whenever you are logged into your WolfWare WordPress site, the Admin Toolbar is visible at the top of the screen. The tools that are displayed may be different depending on whether you are viewing the public-facing website or you are in the admin interface.
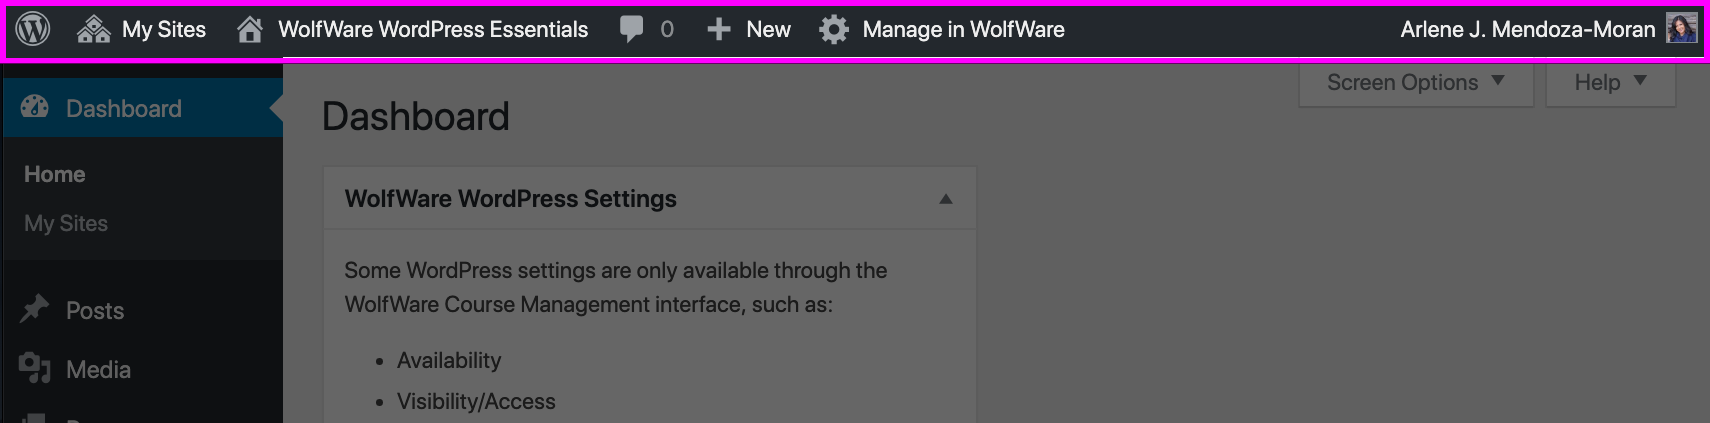
In WolfWare WordPress, the following links are available in the Admin Toolbar:
- WordPress – The WordPress icon contains a sub-menu of WordPress resources. Some of these options link to locations external to WolfWare and NC State, and are part of the broader WordPress community.
- My Sites – This is a list of all of the WolfWare WordPress sites that you have access to as an instructor.
- Site name – When you are in the admin interface, clicking on the site name in the Admin Toolbar takes you to the public view of the website.
- Customize – This option is only available on the Admin Toolbar when you are viewing the public-facing website. Clicking on “Customize” takes you to a screen where you can select options for displaying some of the site-wide page elements.
- Comments – If comments are enabled, the number next to the comments icon indicates the number of comments awaiting moderation. Clicking on the comments icon takes you to the Comments administration section.
- New – Select one of the sub-menu options to add a new post or page, or to upload a new media item.
- View Page/Post – This option is only available when you are editing a post or a page. Clicking on “View Page” will go to the public view of the published post or page. Make sure you save your changes before navigating away from the editing screen.
- Edit Page/Post – This option is only available in the Admin Toolbar when you are viewing the public view of the website. Clicking on it will take you to the editing screen for the current post or page.
- Manage in WolfWare – Clicking on this link opens the WolfWare WordPress settings page in a new tab.
The Navigation Menu
Located on the left side of the admin interface, the Navigation Menu contains tools for adding content to your WordPress site. There are also tools for changing the appearance or functionality of some components.
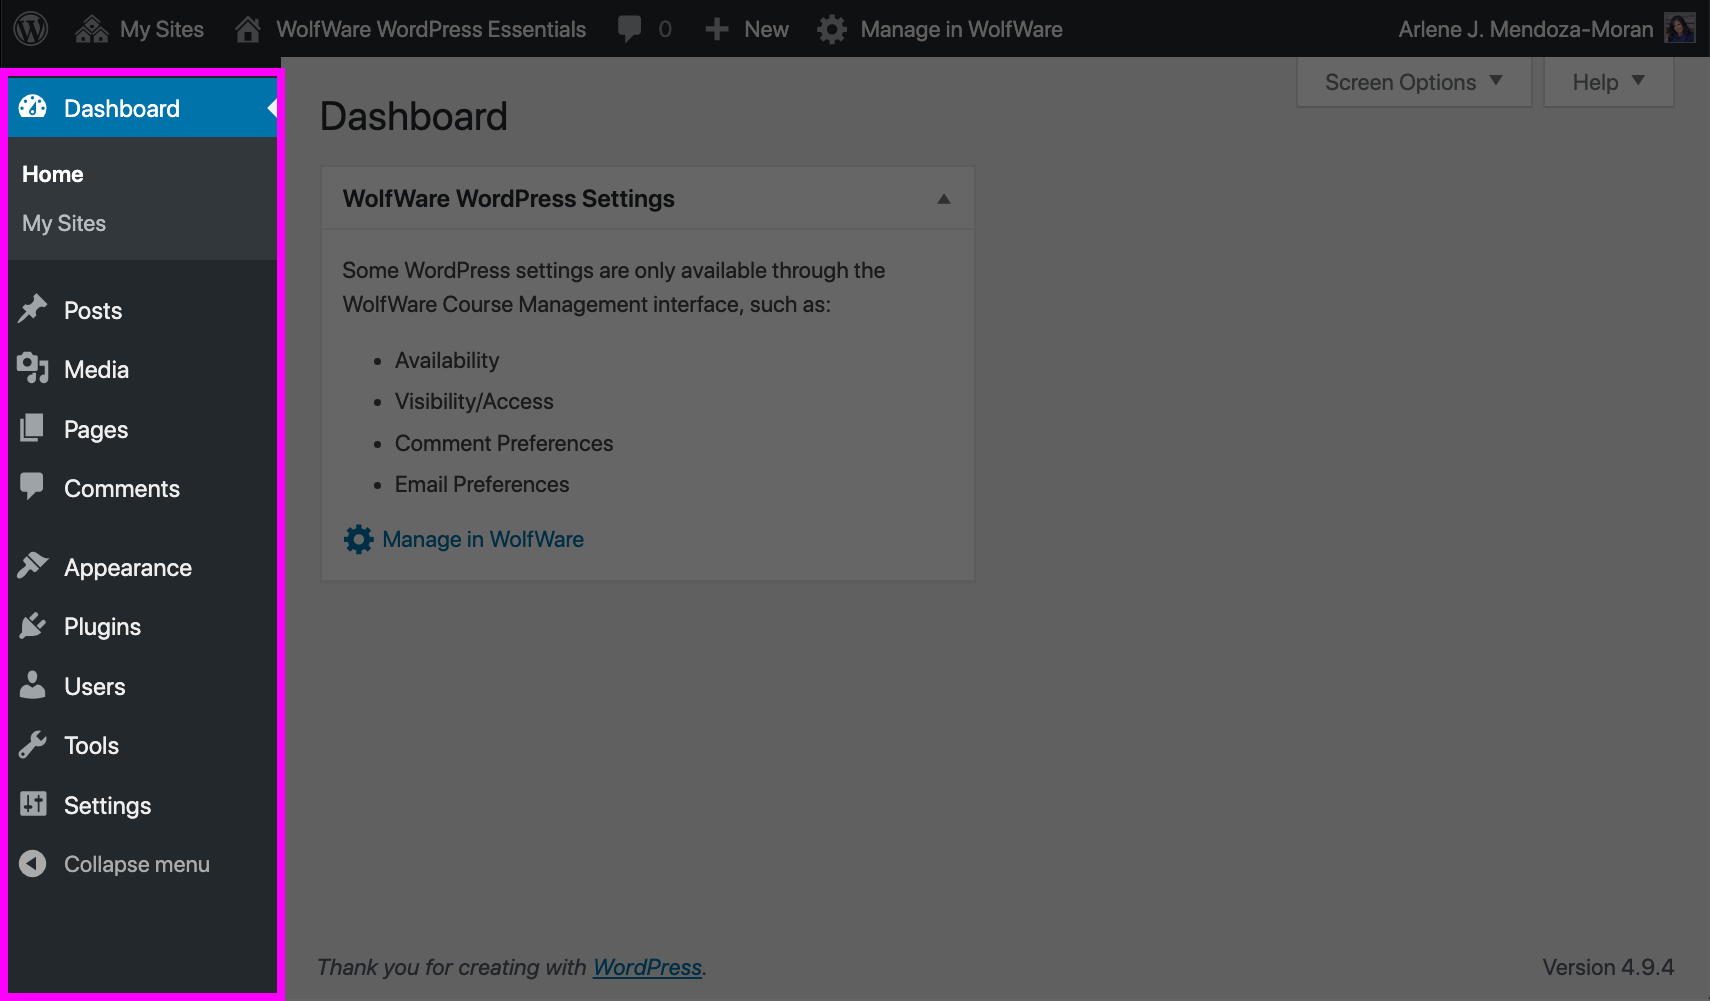
Some of the options in the Navigation Menu have submenus that appear when you hover on them. If you click on one of the options, the submenu will expand and stay open in the Navigation Menu while you are on that set of tools. At the bottom is a “Collapse menu” button that will minimize the menu.
- Posts allows you to add new posts, edit existing posts, and edit tags and categories for your posts.
- Media includes your Library that lists any images, audio and video files you have already uploaded. The Add New link helps you upload new media to your library.
- Pages are static pages on your blog. They are different from posts. Pages can include information about you or the site and are not time sensitive like a post.
- Comments are a way for you to get feedback from your readers. The Comments section allows you to administer your comments to approve, reply, edit, mark as spam or delete. By default, your site will moderate all comments from new people. We also have Akismet spam protection installed.
- Appearance allows you to change some aspects of the look and feel of your site. Please note that there is only one Theme available for WolfWare WordPress and it cannot be changed.
- Plugins are additional pieces of code that change the base functionality of WolfWare WordPress. You can opt to activate or deactivate any of the available plugins on your site. Activating a plugin may add additional options to the navigation menu.
- Users lists all of the people with editing access to the site. Users can only be added/removed through the WolfWare settings.
- Tools contains limited WordPress-specific tools for your browser.
- Settings allows you to change certain default behaviors for various elements in the website.