The WordPress Block Editor allows you to create media-rich pages and posts and control their layout with ease. Every element on a post or page has its own block which you can move, edit and customize.
Note: It is possible to switch between the Block and Classic editor if you prefer one over the other, or would like to allow site editors to choose the editor they prefer.
This information applies to WolfWare WordPress version 6.4. This page was last updated on 8/23/2024.
The Block Editor
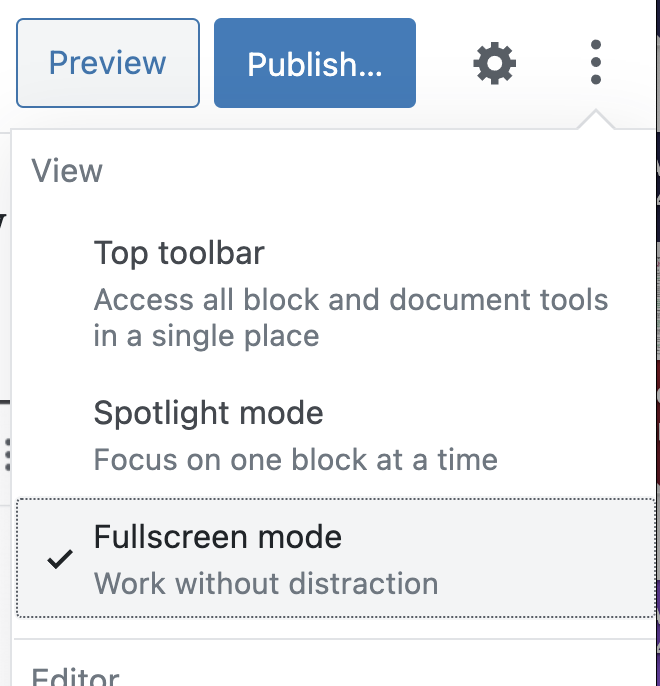
The editing screen is Fullscreen by default. To return to the main admin dashboard view click on the “W” button at the top left. Note that this will make you leave the post or page you were editing.
To toggle off Fullscreen mode, use the 3-dot “options” menu button at the top right and click Fullscreen mode to un-check it. Your choice will be stored in your browser’s local storage. If you switch browsers the choice for the view won’t be available and you have to set your preference again. The same is true when you switch computers.
Using Blocks
The WordPress Editor uses blocks to build your page content. Rather than thinking about a web page as a single document, think of it as a collection of discrete elements that you can configure and arrange easily to create interesting page layouts.
There are many block types for you to choose from. You can edit or move each block independently of other blocks, and individual blocks sometimes come with their own formatting settings for even greater control over layout and function.
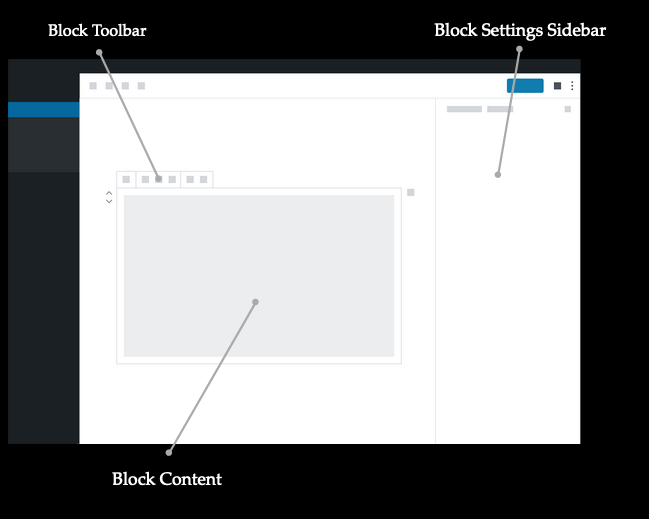
The Anatomy of a Block
Each block consists of a Block Toolbar, a Block Settings Sidebar and the Block Content. Depending on the block’s purpose the buttons of the Block Toolbar will change and so will the settings items in the Block settings sidebar.
Adding a Block to a page or post
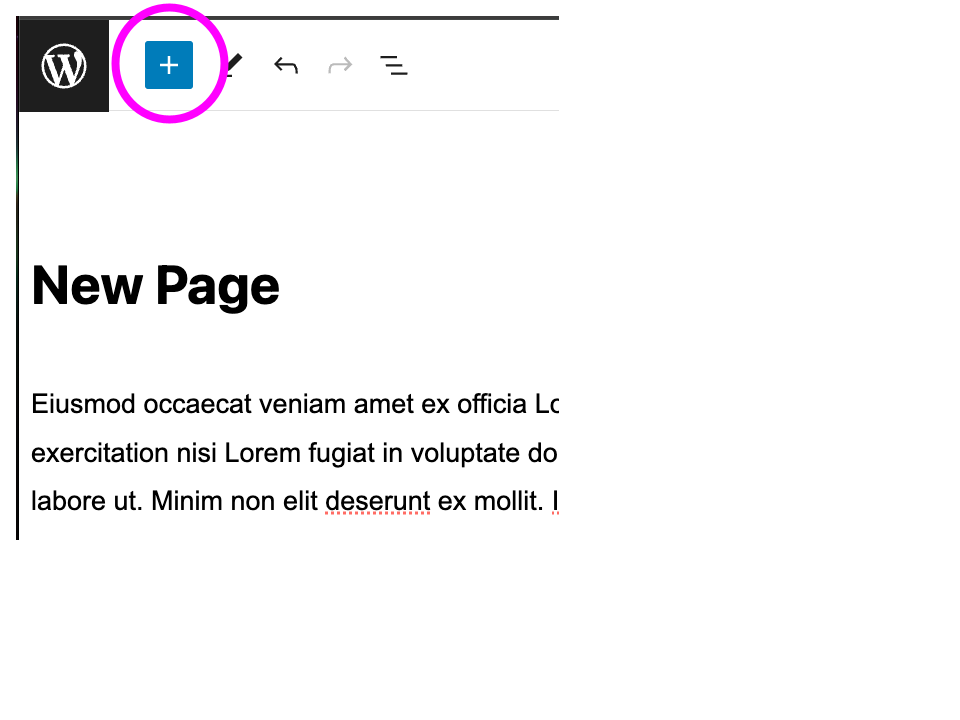
There are multiple ways to add blocks to a page or post. When ever you see the Inserter button ⊕ you can click on it and access the block chooser window.
From the Top Toolbar
One way to add a block is by clicking on the Block Inserter button “+” at the top left of the editor (Top Toolbar).
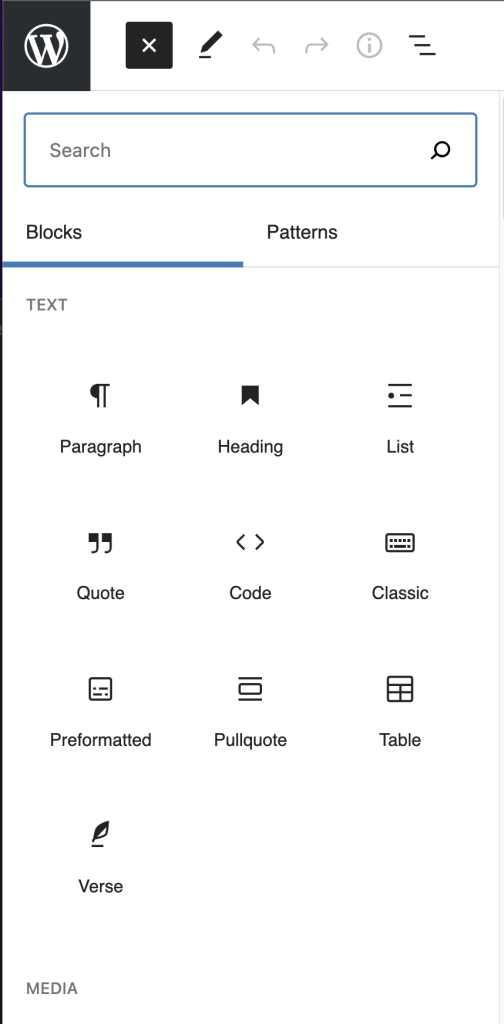
In the block chooser window, you can scroll down to browse available block types. Hover on a block type to see a small preview of the block. If you know the name of the block you want, you can enter it in the search field. You can view descriptions of the different blocks at WordPress.org and view some examples of blocks available in WolfWare WordPress.
From the Bottom of a Block
You can also add a block by hovering near the bottom of any block already added and selecting the Add block “+” button.

Delete and Move Blocks
To delete a block, click on the 3-dot “options” button in the block menu and select Delete at the bottom of the menu.
You can move blocks up and down by using the up and down arrows in the block menu. To drag and drop blocks, click and hold the six-dot-grid on the left side of the block.
Settings sidebar
Click on the Settings button at the top right of the screen to expand and collapse the Settings panel. Here you can configure more settings of the selected block and the whole page/post. Select either the Page or Block tab to adjust settings.
Block settings tab
When a block is selected or being edited, the Block settings will be displayed in the right Settings panel. Configurable options are specific to each type of block.
Page/Post settings tab
Summary
- Visibility – Change whether the page/post is able to be viewed publicly, privately, or password protected.
- Publish – update the publish date
- URL – you can change the last part of the URL (helpful if the page title is long)
- Template – The current Default template has a right sidebar. Choose Full-Width for no sidebars.
Page options
The Page Attributes settings are available when you are editing a page. If you want the current page to be organized as a sub-page nested under a different parent page, you can select the parent page in the Parent Page drop-down menu.
Post options
There are different boxes that are available when editing posts. The Categories section allows you to add or select one or more categories for your post. In the Tags section, you can enter one or more tags (separated by commas) that apply to that post.
Save, View, and Publish
Use the options at the top right of the editing screen to preview, save, and publish your posts and pages.

Select Save Draft regularly while you are writing to ensure that you don’t lose your content.
Select Preview to preview what your post or page will look like to viewers. This opens a new tab in your browser. Make sure to close the Preview tab so that you continue editing in the correct tab.
Select Publish to make your post or page visible on your public-facing website. The text of the button now changes to “Update”
If you want to unpublish a post or page after it has been published, select Switch to draft.
Add a navigation menu
The current WolfWare WordPress theme allows one main navigation menu. There are two main ways to access the menu settings to add a menu.
To add a menu from the Admin Interface:
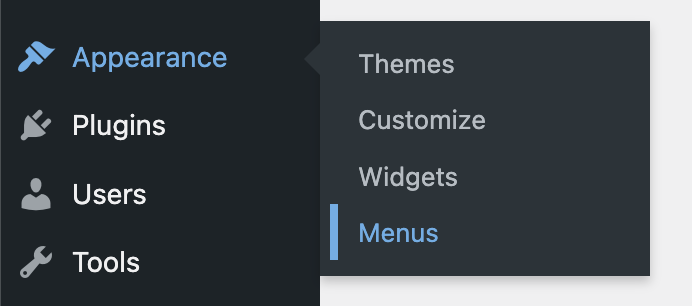
- In the left Navigation menu, hover over or click Appearance. A sub-menu will become visible.
- Click on Menus in the sub-menu.
To add a menu while viewing the site:
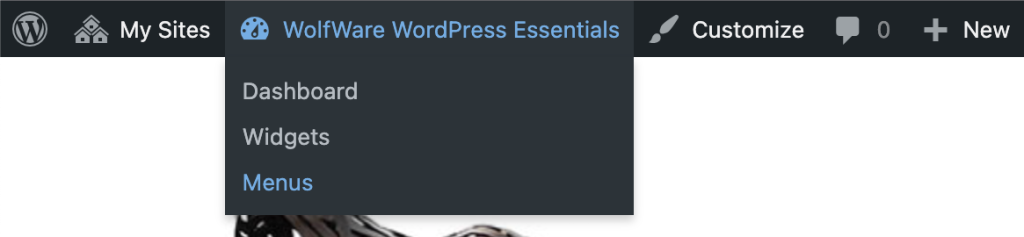
- In the Admin Toolbar, hover over the site name next to the dashboard icon to show a drop-down list.
- Click on Menus in the list.
This will open the Menu editing interface with the Edit Menus tab active.
Add a page to the menu
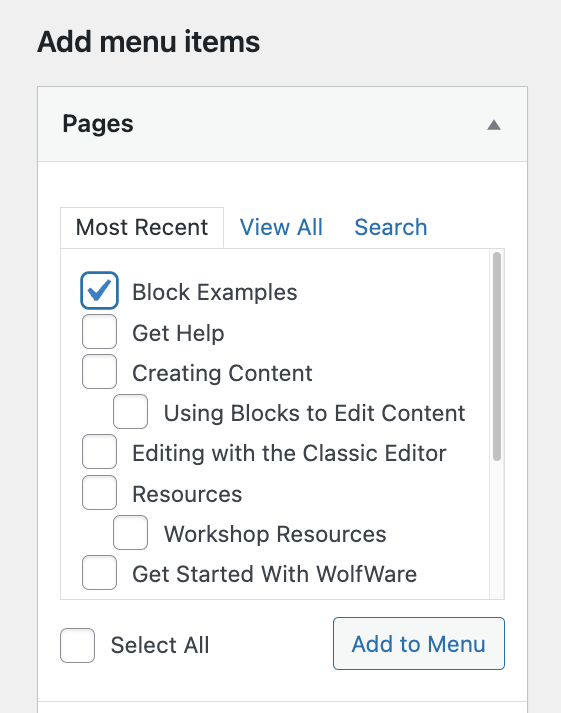
- Under “Add menu items” go to the Pages section (if it is not already expanded, you can click on “Pages” to expand it).
- Find the page you want to add to the menu. By default, only the most recently published pages are shown when “Most Recent” is selected. If you do not see your page there, click on “View All” to see a list of all the pages. Alternatively, click on “Search” if you know some or all of the page title.
- Click in the checkbox next to the page title to select it.
- Click the Add to Menu button. The page will appear at the bottom of the list in the “Menu structure” section (to the right of “Add menu items”)
Change the order of items in the menu
- To change the order in which pages are shown, you can drag them to different positions under the “Menu structure section.
- To have an item appear as a sub-item, drag it slightly to the right so that it is indented underneath the top-level item.
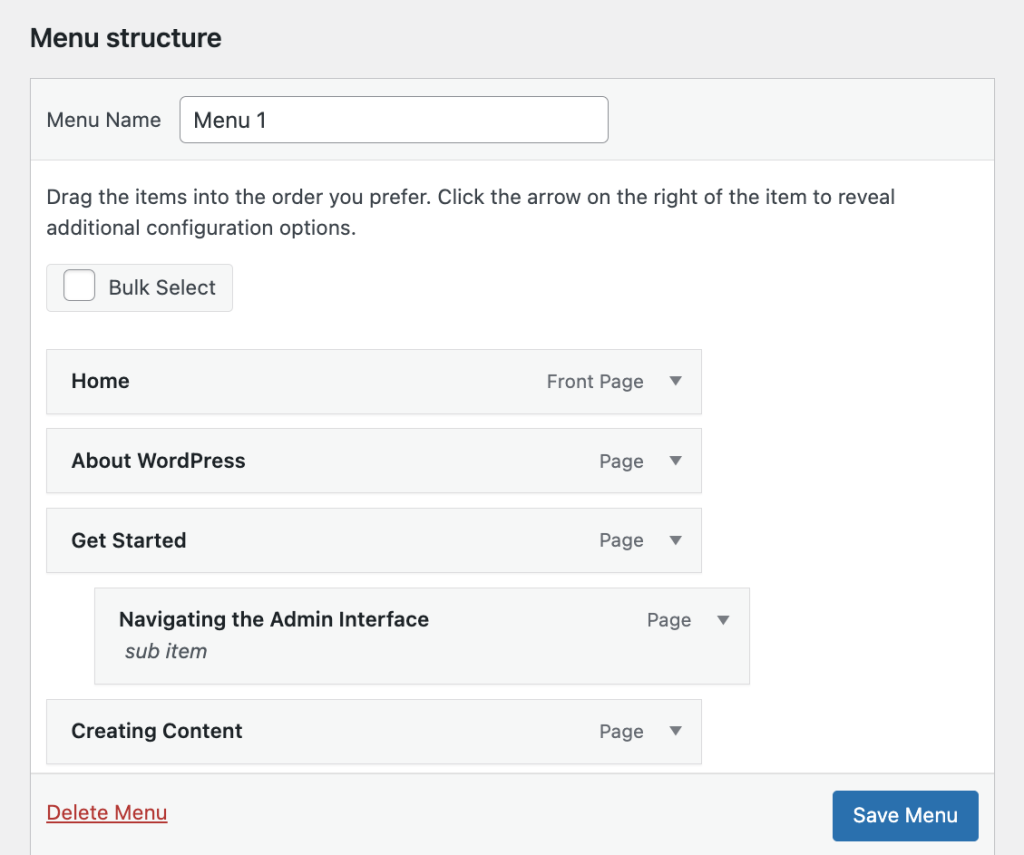
Save the menu
- Click on the Create Menu button to create the menu. It will appear as a horizontal menu at the top of each page.
- You can make changes to the menu, then click the Save Menu button.