Switch from Block to Classic editor
If you prefer to edit using the old “Classic” WordPress editor, you can enable it by changing the Writing settings. (This requires the Classic Editor plugin to be installed and active on the site.)
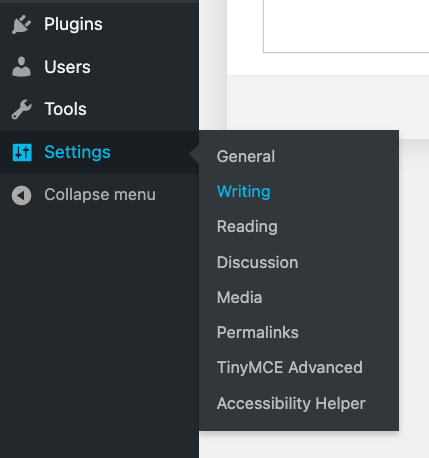
Hover over Settings in the left Navigation Menu, then select Writing in the expanded menu.
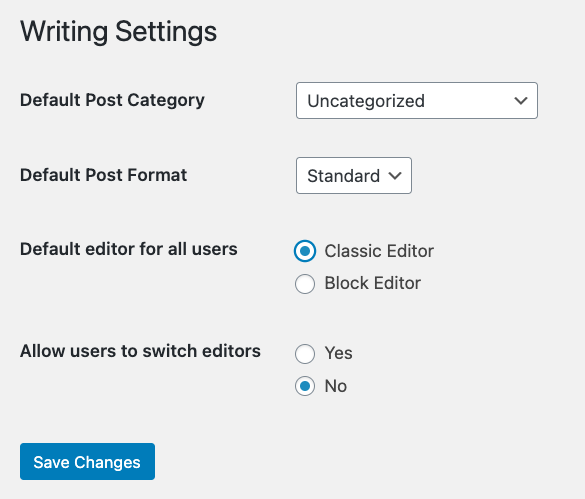
On the Writing Settings screen, you can change the default editor for all users by selecting the radio button next to “Classic Editor” or “Block Editor”. If multiple people have editing permissions on the site, you can choose to allow them to switch between the Classic and Block Editors.
Editing with the Classic Editor
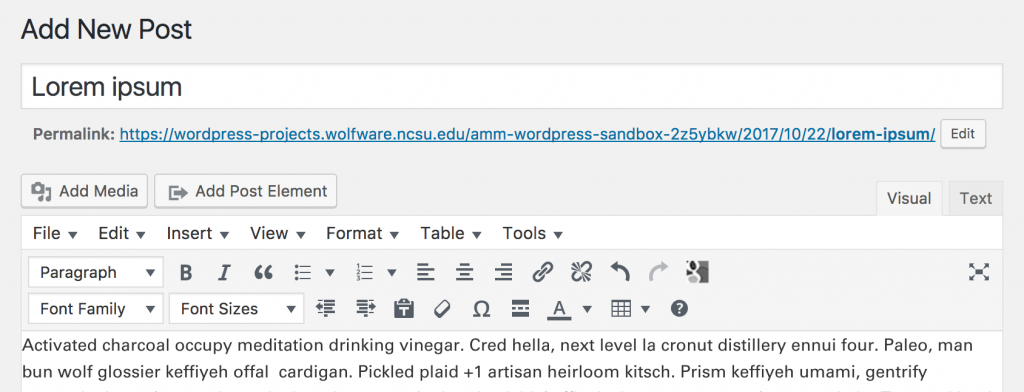
The editing screen for Posts and Pages is similar. At the top is the title field. Below that is the permalink, which will be the URL of the published post or page. The “Edit” button at the end of the permalink allows you to change the last part of the URL, also known as the “slug.” The slug defaults to the title, with dashes between each word. If you have a really long title, you can use the “Edit” button to shorten it in the URL.
The visual editor has tool icons that should be familiar to most people who have used software such as Word or Google Docs for creating documents. You can hover over each of the icons to see what it does. If you would like to view or edit the HTML code for the content, click on the “Text” tab at the top right corner.
Page Options
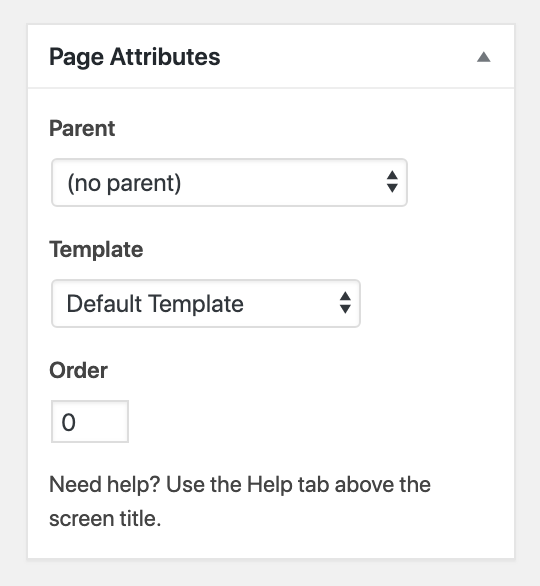
When you are editing a page, the “Page Attributes” box is shown to the right of the editing area. If you want the page to be a sub-page nested under a different parent page, you can select the parent page in the “Parent” drop-down menu. You can choose a layout for the page that is different from the default settings by selecting an option in the “Template” drop-down menu.
Post Options
There are different boxes that are available when editing posts. The “Categories” box allows you to add or select one or more categories for your post. In the “Tags” box, you can enter one or more tags (separated by commas) that apply to that post. The “Post Attributes” box allows you to change the default layout by selecting an option in the “Template” drop-down menu.
Save, View, and Publish
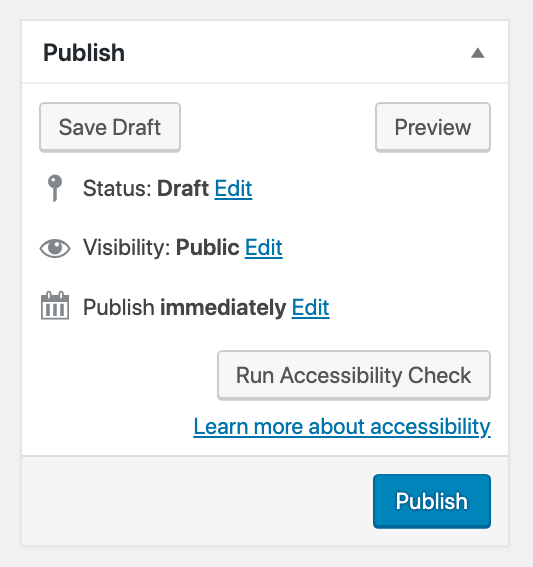
Use the options in the Publish box at the top right of the editing screen to preview, save, and publish your posts and pages.
Click the “Save Draft” button regularly while you are writing to ensure that you don’t lose your content.
Click the “Preview” button to preview what your post or page will look like to viewers. This opens a new tab in your browser. It’s a good idea to move this preview tab into a separate window and having it visible alongside the window in which you are editing so that you don’t have to keep switching between tabs.
Click the “Publish” button to make your post or page visible on your public-facing website. The text of the button now changes to “Update”
If you want to delete a post or page after it has been published, click on the “Move to Trash” link to the left of the “Update” button.
Return to Editing Content