DNA Fingerprinting – Online Make Up Module
Read along in your lab handout with the information in this webpage. Fill in and answer all questions accordingly in the handout. This handout will be collected and graded later.
Lab handout for DNA Fingerprinting – Online Make Up Module – this is based on a different DNA kit than the In-Person lab handout. Students making up this lab should use this handout and website to complete the lab.
Important Background Information to review:
An Introduction to the Human Genome – Basic Structure and Variation in Human DNA
Restriction Enzymes and how they are used with DNA and Restriction Enzyme animation
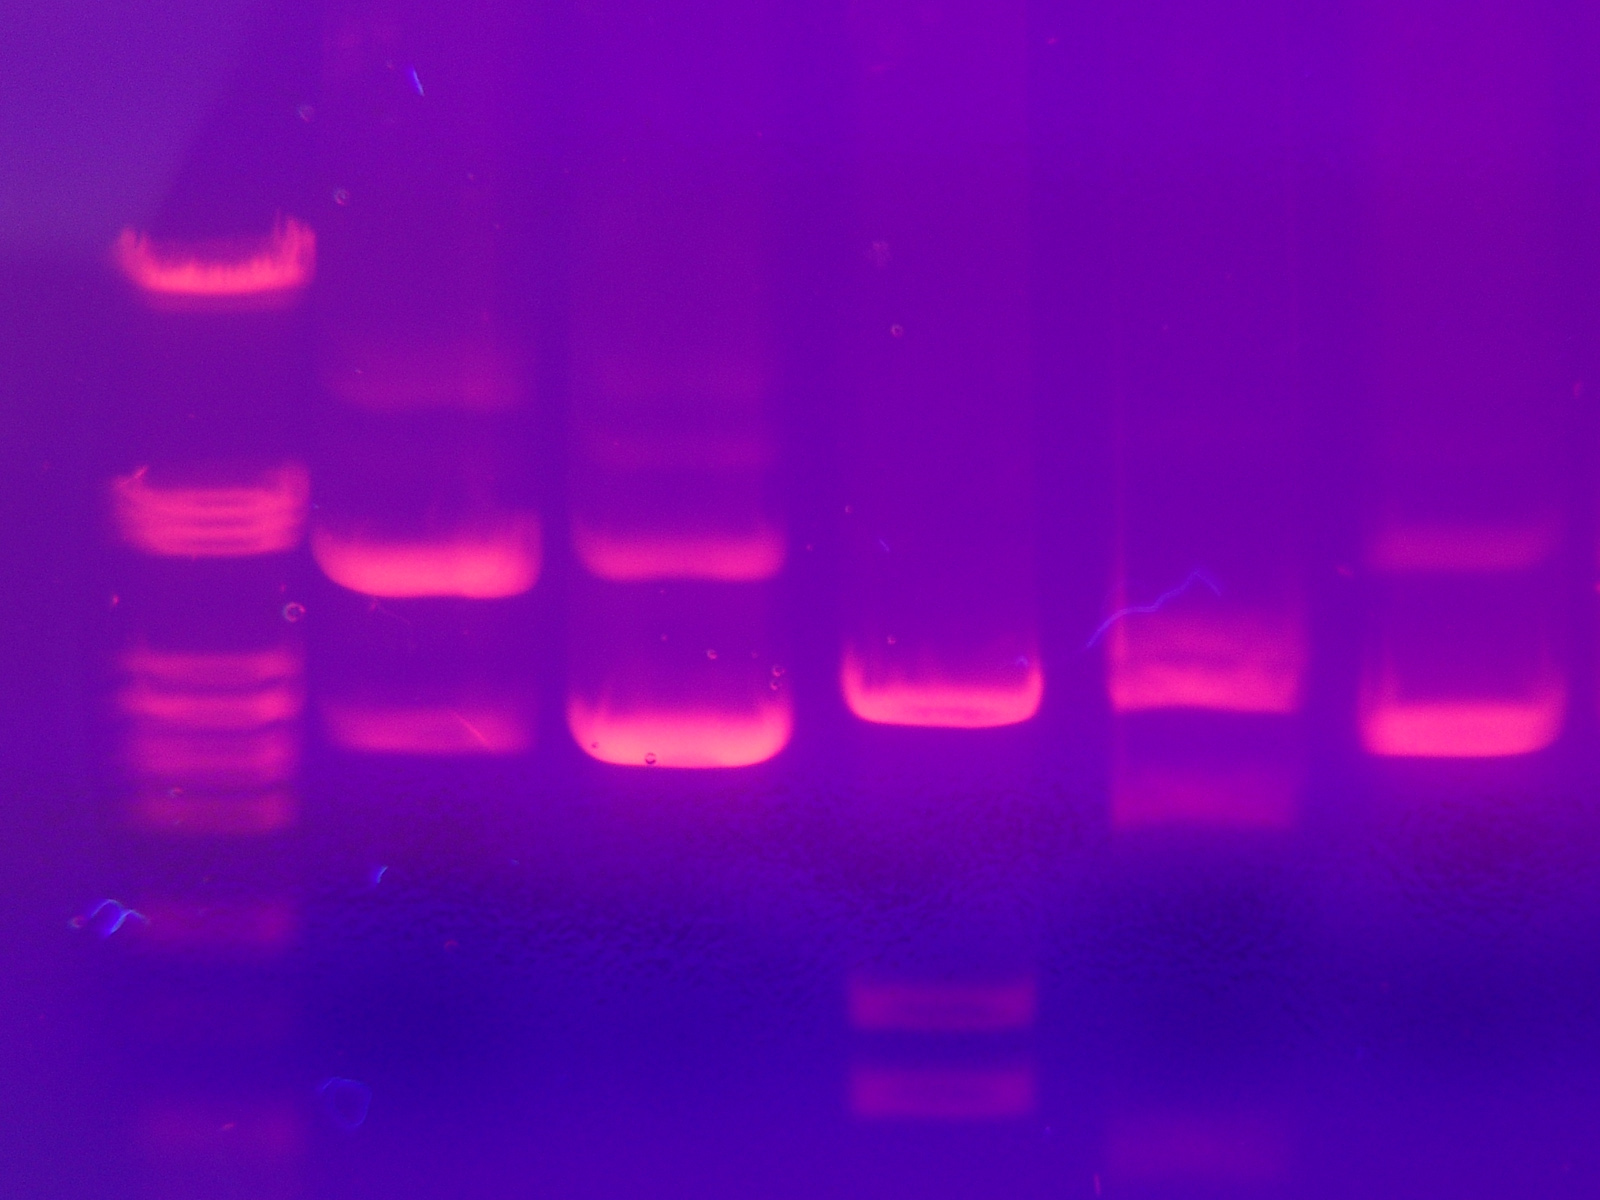
DNA Gel with labeled known DNA fragment sizes (lane 1). This also shows the different banding pattern results (different sized fragments) produced when using different restriction enzymes on the same DNA.
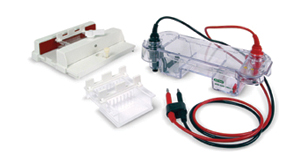
DNA Electrophoresis Equipment:
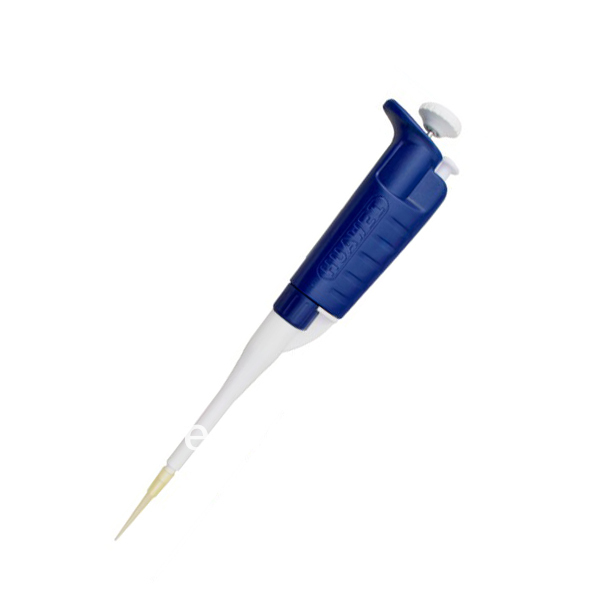
Activity 1; Practice Pipetting – short videoclips
Activity 2: Restriction Digestion of DNA – view the background Information animations above.
Activity 3 & 4: Preparation of the 0.8% Agarose Gel and Electrophoresis Unit and Preparing the DNA Samples and Loading the Gel
In Activity Three, calculate and record the amount of agarose needed to make the indicated 0.8% agarose gels.
Casting an Agarose Gel – we will actually use a casting stand instead of tape to seal the gel tray.
DNA Electrophoresis Procedure – loading and running an agarose gel (as you would have done in lab with the same equipment).
Staining Agarose Gels with Fast Blast Blue – In our teaching labs, we do not use Ethidium Bromide in our gels (it is a highly toxic mutagen and possible carcinogen) as indicated in the DNA Electrophoresis animations in the Background Information above. Instead we will use a non-toxic Fast Blast Blue stain that will bind to the DNA in the gels allowing us to visualize the bands of DNA.
Activity 5: Analyzing the DNA Patterns
- In our lab we will look at the pattern and location of the Crime Scene DNA on the gel and look to see which of the suspects match the same pattern for all the bands.
- Sketch the stained BIORAD DNA gel below and label the lanes. Answer the end of lab Discussion Questions #2-5 in your lab handout based upon this gel.
- We can look more closely at the size of sample DNA bands/fragments by comparing the distance traveled in the gel to the known base pair size of the fragments found in the known DNA Standards/Marker DNA.
| Stained BIORAD DNA Gel (click on image to enlarge) | Stained BIORAD DNA Gel (lanes right to left) | Lambda HindIII DNA size Marker/standard* |
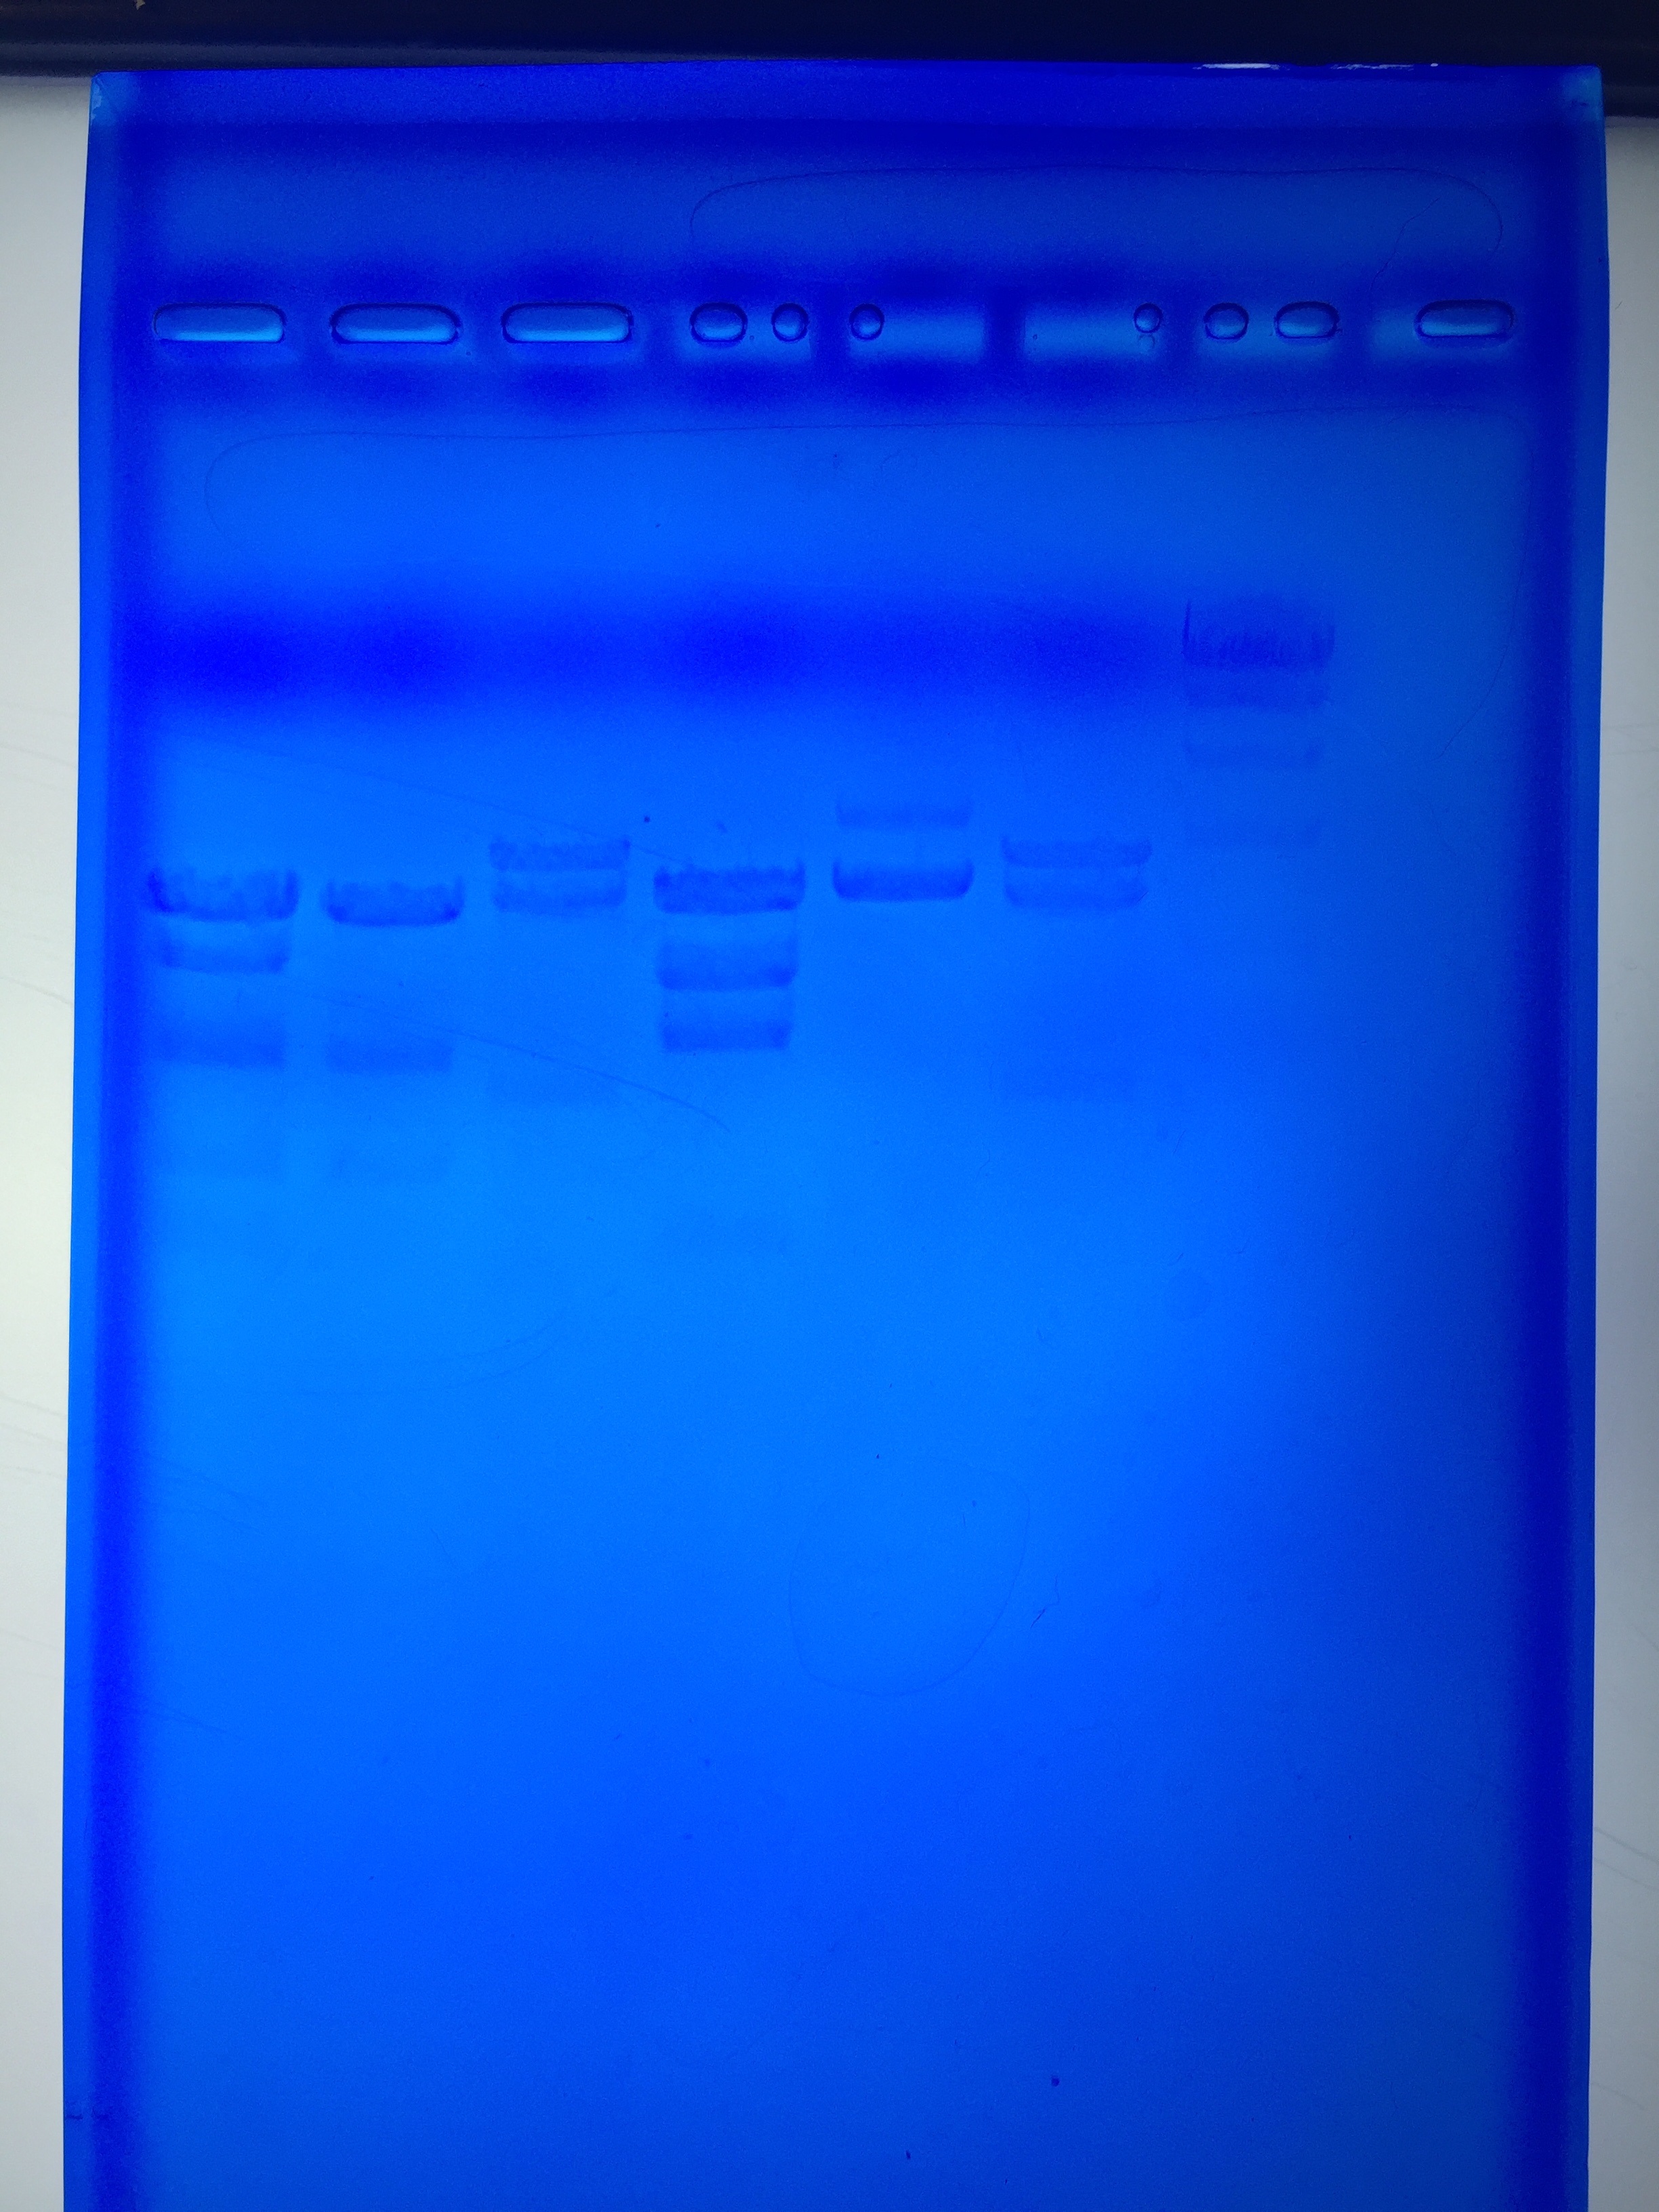 | Lane 1 = Crime Scene Lane 2 = Suspect 1 Lane 3 = Suspect 2 Lane 4 = Suspect 3 Lane 5 = Suspect 4 Lane 6 = Suspect 5 Lane 7 = Lambda HindIII/DNA size marker/standard Lane 8 = Blank (no added DNA) | 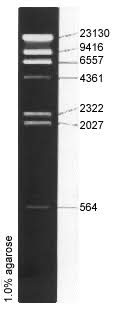 |
* depending on how long a gel is run, you may or may not see all the bands separate.
How DNA Electrophoresis is used in forensics – Nice new webpage – topics include: Can DNA Demand a Verdict? How can DNA be used to identify an individual? Forensic DNA Analysis. Is DNA Analysis alone enough to acquit or convict?
ONLINE Lab Activity – if you missed lab this week:
Who Stole the Crown Jewels? – a paper simulation will be performed in place of an actual in lab DNA electrophoresis. (Carry out this simulations and add it to your lab handout)
Since you were NOT able to perform this in a lab with equipment, we are providing a paper simulation for to complete at home. Print* out the activity and follow the directions. Here you will to cut the provided DNA Samples with a restriction enzyme at the set sequences of base pair units using actual scissors. Then you will place these DNA fragments/pieces on a paper gel diagram according to the base pair size of each fragment. Be sure to examine the provided example of the procedure before proceeding with the actual police report and the DNA sequences from the crime scene and the 4 suspects. Who Stole the Crown Jewels?
Insert this activity into your DNA Fingerprinting lab unit. Include a picture of your completed labeled paper gel or a labeled sketch including base pair unit #s and completed pages 4-6 of the Crown Jewel activity with your DNA Fingerprinting Lab Handout.
* If you do not have a printer, you can write down the size for all the fragments for each of the subjects in your handout. Then sketch a labeled diagram of the resulting gel and explain your evidence for who stole the crown jewels (page 6).
Basic DNA Structure
Molecular Visualization of DNA – do not worry if you have not covered all of these topics in lecture yet. The animation will be helpful when you do review this material.
0-1:48 = DNA Structure — Also seen in the Mitosis and Meiosis lab (this part is important for lab this week)
The rest of this video with be taught later in lecture and be more applicable in the Transformation lab.
1:48-2:53 = DNA Replication –Can you relate this to DNA synthesis? = S phase that you leaned about in the Mitosis and Meiosis in lecture
2:53-4:48 = Transcription – (you will learn about this and Translation later in lecture)
4:48-6:57 = Translation –
6:58-7:47 = Hemoglobin and Sickle Cell Anemia -not narrated
DNA Presentation Expectations and Self Assessment – 30 points total
DNA Presentation Evaluation Sheet
Peer Evaluation form for the DNA Presentation
Important Technologies in Molecular Biology
Polymerase Chain Reaction (PCR) – used to make larger samples of DNA from an initial small amount of sample.
PCR Animation – a nice simple step by step animation to show how PCR works.
Genome Editing with CRISPR-Cas9 a new and powerful technology with many applications.
Gene Editing Tool CRISPER Wins the Chemistry Nobel (2020)
ELISA Anitbody tests – animation that shows the different steps involved in ELISA testing for the presence of antibodies.
Careers in Biotech – nice website. Careers at the Bench and Beyond
Short Reads:
The History of Genetic Fingerprinting
DNA Fingerprinting is Everywhere -discusses some applications.
DNA “Fingerprint” Can Aid Food Safety – NCSU researcher