Gene Transformation – Online Make Up Module
Lab Handout for Gene Transformation lab – Part 1 Online Make UP Module
Read along in your Part 1 and Part 2 lab handouts with the information on this webpage. Fill in and answer all questions accordingly in your lab handout. These will be collected and graded later.
Parts 1 and 2 will cover 2 weeks of lab.


Students should view the following short videos before coming to lab this week. This will provide good background. Also read the Additional Background Information in your lab handout.
Stanford Scientists Produce Cancer Drugs from Rare Plants(1:59) by making plasmids and inserting them into more easily grown plants or yeasts.
Using Restriction Enzymes and DNA Ligase to make plasmids (1:38)
Funding Basic Science to Revolutionize Medicine(3:59) that show how the focus in research has changed over the past 50 years.
How GFP is used in research(10:03)
Video of BIORAD pGlo Transformation procedure (7:01) – what you would have done in lab this week. You may want to follow along in the Activity 2 directions in your lab handout.

Activity 1: In-Lab discussion with your TA – Important Concepts in the Transformation Procedures:
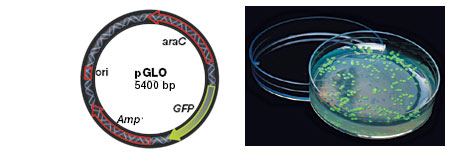
pGlo Plasmid we will use in lab. Why are these genes important? What do they code for?
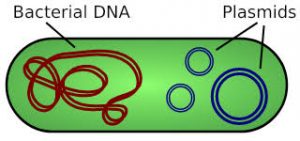
DNA transformation using plasmids – animation explaining the steps in our Transformation procedure. It is very important to understand the nature of the bacterial cell wall, why CaCl2 is used, and why the heat shock is important.
Answer the Protocol Discussion questions #1-8.
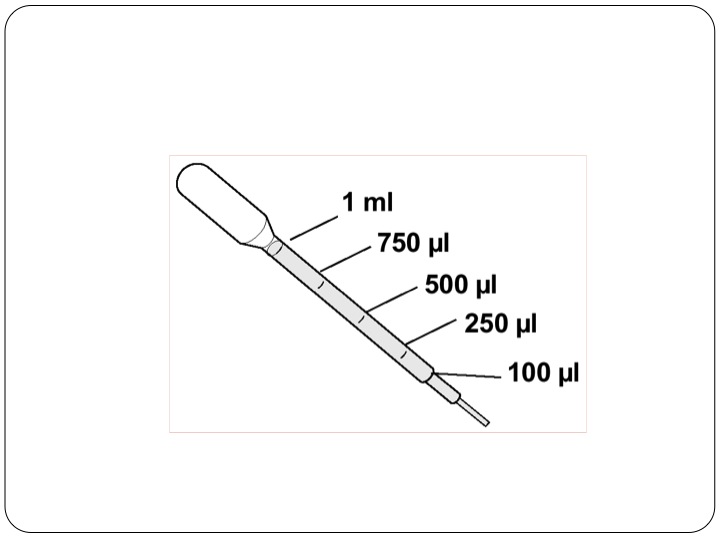
Measurement marks on disposable plastic pipettes provided in the BIORAD kit:

Activity 3 – Experimental Treatments and Proposed Results
- Fill out the table at the end of this handout to indicate what you think the results would be for each of the 4 agar plates that were inoculated in this procedure. Also fill out the gray boxes for the agar plates that were not inoculated, but still indicate what you’d expect to happen with those nutrient conditions for the bacterial growth plates that did and did not get the plasmid added. Include why you think you’d get these results in ALL the boxes as well.
End of Transformation Part 1 (week 1)
Start of Transformation Part 2 (week 2)
Transformation Efficiency Calculation – Transformation Lab Part 2 (week 2)
Lab Handout for Gene Transformation Calculations Online – Part 2 – read before coming to lab.
Activity 1: Data Collection from Transformation Plates
Actual Results: The following pictures show the bacterial growth on the different nutrient agar plates under white light and UV light from a previous semester.
- Record the data in Table 1 in your lab handout that corresponds to your assigned Group. Be sure to collect data from both the White Light and the UV Light pictures. For example, if you are assigned to Group 3, you only need to record data from the Group 3 pictures – both white light (3-WL) and UV light (3-UV).
- Answer questions #2-6.
Images of bacterial growth from 4 different student lab groups.
“+” Refers to the addition of DNA/Plasmid, “-” refers to no addition of DNA/Plasmid to the bacterial samples.
| Light Source | Group 1 | Group 2 | Group 3 | Group 4 | ||
| White Light (WL*) | 1-WL | 2-WL | 3-WL | 4-WL | ||
| UV Light (UV*) | 1-UV | 2-UV | 3-UV | 4-UV |
* We have pictures for all 6 possible plates both white light UV light, though in the lab students will only get access to 1LB plate, 2 LB/Amp plates and 1 LB/Amp/Ara plate (4 plates total).
Activity 2: Calculating Transformation Efficiency
- Read through the provided information and follow the prompts to calculate the transformation efficiency on your assigned +LB/amp/ara agar plate. Be sure to include the units as you set up each equation.
- Your TA will collect transformation efficiency data from each group so that you can fill out Table 2 Class Results and answer all the Discussion Questions at the end of the lab unit.
The Evolution of Bacteria on a Mega-Plate Petri Dish – Natural mutation for antibiotic resistance in bacteria growing on nutrient agar containing an antibiotic.
Molecular Visualization of DNA
0-1:48 = DNA Structure — Also seen in the Mitosis and Meiosis lab
1:48-2:53 = DNA Replication –Can you relate this to DNA synthesis? = S phase that you leaned about in the Mitosis and Meiosis in lecture
2:53-4:48 = Transcription – (you will learn about this and Translation later in lecture)
4:48-6:57 = Translation – (you will learn about this and Translation later in lecture)
6:58-7:47 = Hemoglobin and Sickle Cell Anemia -not narrated
DNA Presentation Expectations and Self Assessment – 30 points total
DNA Presentation Evaluation Sheet
Peer Evaluation form for DNA Group Presentations
Additional Information on Biotechnology:
Check out the opportunities for undergraduate students! Certificate, Minor, Courses…..(look under Academic Programs)
Link to information on a Minor in the Biotechnology Program at NCSU and Courses in Biotechnology (BIT) at NCSU
Link to the Undergraduate Programs at the BTEC center on Centennial Campus NCSU – where industry and education meet.
At BTEC they use similar transformation procedures to engineer bacteria and yeasts to make (Biomanufacturing) chemicals, medicines, vaccines, enzymes, proteins, biofuels…….
Careers in Biotech – nice website. Careers at the Bench and Beyond
Great Short articles related to this important technology
GFP – Green Fluorescent Protein – Cool Uses
Brianbow – New Resources and Emerging Biological Applications for Multicolor Genetic Labeling and Analysis – Informative and beautiful images!
PCR Animation – a nice simple step by step animation to show how PCR works.
ELISA Anitbody tests – animation that shows the different steps involved in ELISA testing for the presence of antibodies.
PCR Animation – a nice simple step by step animation to show how PCR works.
ELISA Anitbody tests – animation that shows the different steps involved in ELISA testing for the presence of antibodies.
